

Starting mid-September, any and every meal, in my opinion, should be allowed to have some kind of pumpkin incorporated into it. Also starting in mid-September, there is usually an increase in rainfall here in Seattle. More rain = more time in the kitchen = more pumpkin recipes, which is basically a win-win for everyone. For my first pumpkin recipe of the season, I was in the mood for a homemade pasta. Too many times I will go into a store and buy the butternut squash pastas and it is much too sweet and has a harder time pairing with sauces, so naturally I wanted to try to make my own. I made a Pumpkin Ravioli with a Brown Butter Sage sauce, topped with a crispy prosciutto and pecorino romano. Simply, it was to die for. The flavors and textures melded together perfectly. The wine I paired with it was a bold Chianti Riserva, Castello Di Volpaia, and the dark cherry and tannic after bite were a perfect match. I hope you enjoy!


- 2 1/2 C all purpose flour
- 1/4 tsp, fine sea salt
- 4 eggs at room temperature
- 2 tsp olive oil
- 3/4 canned pumpkin – I used Libbys
- 1 T brown sugar
- 1/8 tsp ground nutmeg
- 1 Stick of butter
- 10 fresh Sage Leaves
- Pecorino Romano
- 3 fresh slices of Prosciutto de Parma
- To make the dough – with a food processor, fit a food processor with the metal blade. Add all but 1/2 cup of the flour and the salt to the work bowl and pulse to mix. You will use the reserved 1/2 cup flour later to adjust the consistency of the dough.
- Crack the eggs into a liquid measuring cup and remove any stray shells. Add the olive oil; there is no need to stir. Pour the eggs and oil into the work bowl. Process until the flour is evenly moistened and crumbly, about 10 seconds. Test the dough by pinching it; if it is very sticky, add more flour, 1 Tbs. at a time, processing until it is incorporated. After about 30 seconds total, the dough should come together in a loose ball and feel moist but not sticky.
- Dust a clean work surface with flour. Remove the ball of dough from the food processor and place it in the center of the floured surface. Using your hands, flatten the dough into a disk.
- For both methods: Using the heel of your hand, push the dough down and away from you, fold it in half back toward you, rotate a quarter turn and repeat the kneading motion. After about 7-10 minutes, the dough should be smooth and elastic.
- Shape the dough into a ball, cover with an overturned bowl and let rest for 15 minutes before you roll it out. The gluten in the flour will relax, making the dough easier to roll. Do not let it rest longer or it will be too dry. Makes 1 lb. dough.
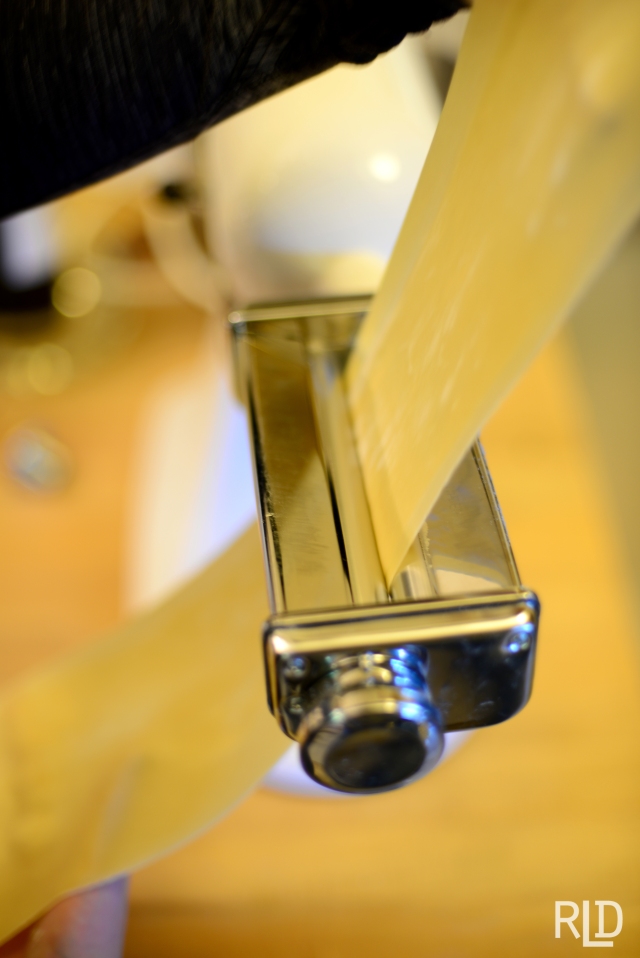
- To make your pasta – you can either roll it out very thin with your rolling pin or with some kind of pasta maker. I used the Kitchenaid pasta attachment which just saves time from all of the rolling. If you do not have an attachment, just take your dough, cut it into two seconds and begin rolling. I also used a ravioli mold instead of eyeballing it. I have found this helps make the pasta consistant and helps prevent overstuffing. How you want to make the actual ravioli is totally personal preference. Make sure there is just enough flour on your cutting board to lightly coat the dough. If you have too much, the pasta will be dry and lose its flavor.
- Once you have rolled it out to be extremely, almost paper thin, cut your dough so there are four equal sized layers, two for the base and two for the top. If you are using a mold, be sure to flour the mold so your dough does not stick. Once the bottom layer is on, fill each pocket with your pumpkin filling (see directions for filling below).
- Use a second sheet of dough to cover the top of the filled mold. Run a rolling pin over the top to have the sections connect into one piece of pasta. Trim the edges of extra dough away from the mold and begin taking out your completed pasta!
- Repeat for the second batch of dough.
- Cook in boiling water until the pasta comes floating to the top. You should only have to cook the pasta for about 5-7 minutes since it is fresh. Remove from water when the pasta is al-dente. Add into the brown butter sage sauce, see directions below.
- For the filling – combine pumpkin, brown sugar, nutmeg, salt and pepper in a mixing bowl. Set aside until ready to use.
- There are two ways to get your prosciutto to the perfect crispy consistency. First, is to use your broiler and keep a very close eye as the thin ham can easily burn. The second, and my favorite way, is to heat your oven to 350 degrees and let your prosciutto bake. This way, there is less of a chance of burning and you don’t have to check it every 10 seconds. After about 5 minutes, flip the prosciutto on to the other side to finish off until the crisp of your liking is achieved. Set aside to cool. Once cooled, crumble into a bowl and set aside until ready to use.
- For the Brown Butter Sauce – Melt your stick of butter over medium heat. Keep stirring and the butter will begin to brown. Make sure your heat isn’t too high so the butter doesn’t burn. Once the butter is a brown color, add in your fresh sage leaves. They will begin to lightly fry. You want this for a crispy texture when the dish is finished. Let the sauce simmer for about 5 more minutes and then add in the ravioli.
- Crumble your crispy prosciutto over the top of the pasta and finish it off with your shredded pecorino romano.
- Serve warm and enjoy!
Dough used: William Sonoma Egg Pasta
© Rachel Davidson and Wine, Dine and Wander, 2014. Unauthorized use and/or duplication of this material without express and written permission from this blog’s author and/or owner is strictly prohibited. Excerpts and links may be used, provided that full and clear credit is given to Rachel Davidson and Wine, Dine and Wander with appropriate and specific direction to the original content.